1.30.2022

Pita Bread

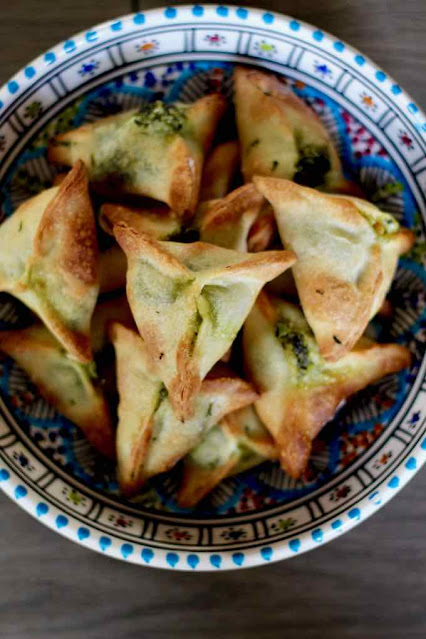
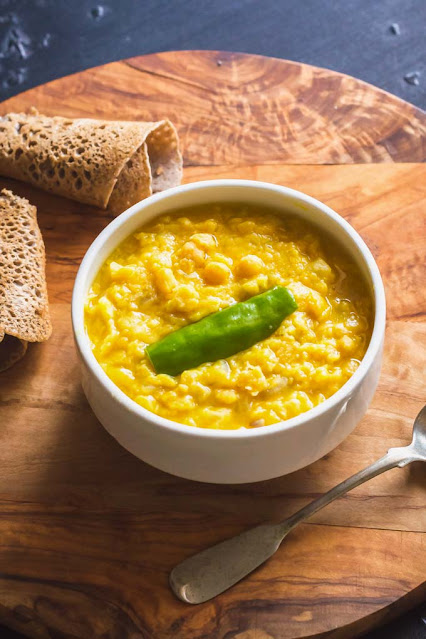
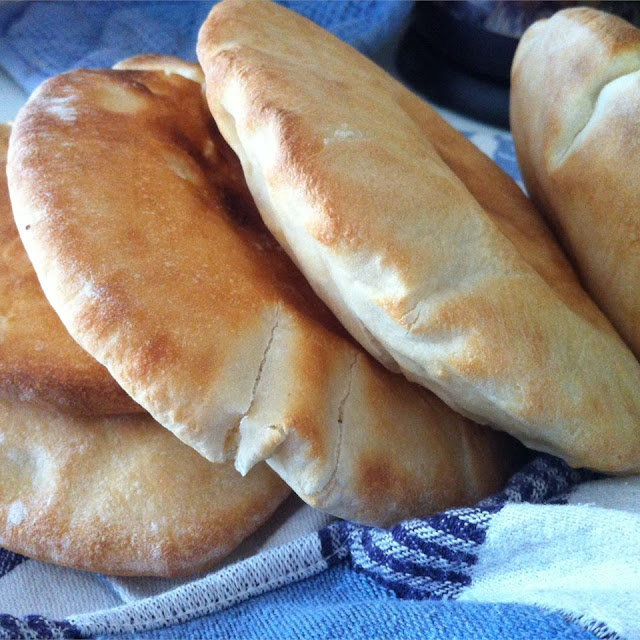
Pita bread is a soft and thin flat bread, consumed in the Near East and Middle East as well as in Southern Europe and the Balkans.


  • Water
  • 2 tsp active dry yeast
  • 1/2 tsp sugar
  • 3 cups all-purpose flour, divided (or 1 1/2 cup all-purpose flour and 1 1/2 cup whole wheat flour)
  • 1 to 2 tsp kosher salt 
  • 2 tbsp extra virgin olive oil, more for the bowl

INSTRUCTIONS

  1. Make sponge: In a large mixing bowl add 1 cup lukewarm water and stir in yeast and sugar until dissolved. Add 1/2 cup flour and whisk together. Place the mixing bowl in a warm place, uncovered to form a lose sponge. Give it 15 minutes or so, the mixture should bubble.
  2. Form the pita dough: Now add salt, olive oil and almost all the remaining flour (keep about 1/2 cup of the flour for dusting later). Stir until mixture forms a shaggy mass (at this point, the dough has little to no gluten development and just looks like a sticky mess and you can easily pull bits off). Dust with a little flour, then knead the mixture inside the bowl for about a minute to incorporate any stray bits.
  3. Knead the dough: Dust a clean working surface with just a little bit of flour. Knead lightly for a couple minutes or so until smooth. Cover and let the dough rest for 10 minutes, then knead again for a couple more minutes. The dough should be a little bit moist, you can help it with a little dusting of flour, but be careful not to add too much flour.
  4. Let the dough rise. Clean the mixing bowl and coat it lightly with extra virgin olive oil and put the dough back in the bowl. Turn the dough a couple times in the bowl to coat with the olive oil. Cover the mixing bowl tightly with plastic wrap then lay a kitchen towel over. Put the bowl in a warm place. Leave it alone for 1 hour or until the dough rises to double its size.
  5. Divide the dough. Deflate the dough and place it on a clean work surface. Divide the dough into 7 to 8 equal pieces and shape them into balls. Cover with a towel and leave them for 10 minutes or so to rest.
  6. Shape the pitas. Using a floured rolling pin, roll one of the pieces into a circle that's 8-9 inches wide and about a quarter inch thick. It helps to lift and turn the dough frequently as you roll so that dough doesn't stick to your counter too much. (If dough starts to stick, sprinkle a tiny bit of flour). If the dough starts to spring back, set it aside to rest for a few minutes, then continue rolling. Repeat with the other pieces of dough. (Once you get going, you can be cooking one pita while rolling another, if you like). You have two options for baking the pita from here.
  7. To bake pita in the oven: Heat the oven to 475 degrees F and place a heavy-duty baking pan or large cast iron skillet on the middle rack to heat. Working in batches, place the rolled-out pitas directly on the hot baking baking sheet (I was only able to fit 2 at a time). Bake for 2 minutes on one side, and then, using a pair of tongs, carefully turn pita over to bake for 1 minute on the other side.  The pita will puff nicely and should be ready. Remove from the oven and cover the baked pitas with a clean towel while you work on the rest of the pitas.
  8. To cook pita on stovetop: Heat a cast iron skillet over medium-high heat. (Test by adding a couple drops of water to the skillet, the skillet is ready when the beads of water sizzle immediately). Drizzle a tiny bit of extra virgin olive oil and wipe off any excess. Working with one pita at a time, lay a rolled-out pita on the skillet and bake for 30 seconds, until bubbles start to form. Using a spatula, flip the pita over and cook for 1-2 minutes on  the other side, until large toasted spots appear on the underside. Flip again and cook another 1-2 minutes to toast the other side. The pita is ready when it puffs up forming a pocket (sometimes, with this method, the pita may not puff or may only form a small pocket. Try pressing the surface of the pita gently with a clean towel). Keep baked pita covered with a clean towel while you work on the rest.

Mofletta

 The mofletta is a Moroccan Jewish crepe traditionally prepared during the celebration of the Mimouna, at the end of Passover.

Ingredients

  • 4 cups flour
  •  cup warm water (more or less)
  • 1 teaspoon salt
  • 1 tablespoon caster sugar
  • 4 teaspoons active dry yeast
  • ¾ cup vegetable oil (to work the dough)
  • 3 tablespoons vegetable oil (to grease the pan)

Equipment

  • Stand mixer

Instructions

  • Dilute the yeast and sugar in ½ cup (120 ml) of water and set aside for 15 minutes.
  • In the bowl of a stand mixer, add the flour and dig a well in the center.
  • Pour the mixture of water, sugar and yeast into this well.
  • While kneading at medium speed, add the remaining water gradually, then add salt.
  • Knead at high speed to obtain a very soft dough that comes off the edges of the bowl.
  • Depending on the quality of the flour, it may be necessary to add water or flour to the dough.
  • Let the dough rise for 1 hour covered with a cloth, away from drafts.
  • Divide the dough into 25 pieces and toss them. Then coat them with oil and let them sit on a plate for 15 minutes.
  • Heat a pan and lightly grease with a brush.
  • On a very well oiled work surface, and with the help of your hands, spread the first piece of dough as thinly as possible, paying attention not to create any hole.
  • Place the first mofletta on the hot pan.
  • After about 20 seconds, turn the mofletta over and add another piece of dough over the first (cooked side). Turn everything over after one minute.
  • Repeat the process with another raw mofletta placed on the previous ones and so on until all the pieces of dough have been used.
  • Serve the hot moflettas with honey, butter and mint tea.

Fatayer

 Fatayer (or fitiir) is a traditional Lebanese mezze that consists of a spinach stuffed turnover, also popular in Turkey and Middle Eastern countries.

Ingredients

For the filling

  • 2 lb spinach , chopped, washed and drained
  • 2 onions , cut into small cubes
  • 5 tablespoons olive oil (or sunflower oil)
  • 3 lemons , freshly squeezed
  • 1 teaspoon black pepper
  • 1 teaspoon salt
  • 1 teaspoon sumac
  • ½ teaspoon cumin
  • ½ teaspoon paprika
  • 1 tablespoon pomegranate molasses

For the dough

  • 3 cups flour
  • ½ cup sunflower oil (or olive oil)
  •  cup fine semolina
  • 3 tablespoons milk powder
  • 1 teaspoon active dry yeast
  • 3 tablespoons white vinegar
  • 1 teaspoon salt
  • 1 teaspoon sugar
  • ½ cup warm water (more or less)

Equipment

  • Stand mixer

Instructions

Filling

  • The day before, mix all the filling ingredients in a frying pan over a high heat.
  • Brown, stirring regularly, for 10 minutes.
  • Cool and reserve in the refrigerator.
  • The next day, mix this stuffing well and add into a colander.

Dough

  • In the bowl of a stand mixer, add the flour, semolina, salt, sugar, milk powder and mix well.
  • Dig a well in the center and add in the yeast.
  • Add the oil, and the white vinegar and, while adding the water gradually, knead until obtaining a smooth dough that separates from the sides of the bowl and can be collected as a ball around the dough hook.
  • Place the dough in a bowl, coat with a little oil on the surface, cover it with a cloth and let it sit for one hour at room temperature.
  • Roll the dough into a large disc and cut into small circles 3 inches (8 cm) in diameter.
  • Drop 1 tablespoon of spinach stuffing in the center of each circle.
  • Lift the 3 ends and fold them inwards so as to completely enclose the stuffing and form a triangle and then pinch the edges to seal them well.
  • Arrange the fatayer on a baking sheet lined with parchment paper and bake at 350 F (180°C) until the base is fully baked and the surface is lightly browned.

Mutabal

 Mutabal, an aubergine salad born from baba ghanoush, is a traditional Middle Eastern mezzé made from eggplant, tahini, lemon, yogurt and garlic.


Ingredients

  • 3 large eggplants
  • 3 tablespoons extra virgin olive oil
  • 1 cup Greek yogurt (sheep's milk)
  • 2 tablespoons tahini
  • Juice of 2 lemons
  • 3 cloves garlic
  • Salt

For the garnishing

  • 2 tablespoons finely chopped parsley
  • 3 tablespoons extra virgin olive oil
  • ½ teaspoon Aleppo pepper (or paprika)

Equipment

  • Mortar and pestle

Instructions

  • Roast whole aubergines (with skin) in direct contact with a flame or embers until the skin becomes black and the flesh is soft.
  • Remove the skin, taking care to remove all charred fragments.
  • Squeeze the eggplant pulp to remove as much as possible of the bitter liquid.
  • In a mortar, crush garlic cloves with salt using a pestle.
  • Then add all the other ingredients into the mortar.
  • Using the pestle, mix everything while crushing it roughly. Adjust the seasoning if necessary.
  • Pour the mixture on a plate.
  • Drizzle olive oil on top.
  • Sprinkle with Aleppo pepper (or paprika) and chopped parsley.
  • Serve with pita bread.

Kik Alicha

 Kik alicha is a traditional Ethiopian vegetarian dish made with yellow split peas, turmeric and niter kibbeh.


Ingredients

  • ½ lb yellow split peas
  • 1 white onion , finely grated
  • 2 teaspoons grated fresh ginger
  • 3 cloves garlic
  • 3 tablespoons niter kibbeh (Ethiopian spicy clarified butter)
  • 2 jalapeño peppers (to taste), halved lengthwise
  • 1 teaspoon ground turmeric
  • 1 tablespoon fine salt

Instructions

  • Soak the yellow split peas in plenty of cold water for 1 hour.
  • Drain them.
  • Boil three times the volume of split peas in water.
  • As soon as the water comes to a boil, add the drained split peas.
  • Add the onion and cook, covered, for 45 minutes, or until the split peas are tender, stirring occasionally.
  • Season with salt, mix, and cook for 1 minute.
  • Add the garlic, ginger and turmeric and cook for another 10 minutes.
  • Add the niter kibbeh and the peppers. Mix well so that the aromas diffuse in the split peas.
  • Serve piping hot with injera.

Himbasha (Ethiopian bread)

 Himbasha is a traditional Ethiopian and Eritrean flatbread with a sweet and savory flavor that is mostly prepared for Christmas.


Ingredients

  • 6 cups flour
  •  tablespoons active dry yeast
  • 2 teaspoons ground cardamom
  • 1 tablespoon fine salt
  •  cup caster sugar
  • ½ cup niter kibbeh (melted and cooled) or olive oil
  • 2 tablespoons tikur azmud or habba sawda (Ethiopian nigella) or black sesame seeds
  • 2 cups lukewarm water (more or less), at 95 F / 36°C

For brushing

  • 3 tablespoons milk
  • 3 tablespoons niter kibbeh (melted and cooled), or olive oil

Equipment

  • Stand mixer
  • Pastry brush
  • Sharp knife
  • Rolling pin
  • 2 round pans (about 12 inches / 30 cm in diameter)

Instructions

  • In the bowl of a stand mixer, add the flour, ground cardamom, sugar, tikur azmud or habba sawda (Ethiopian nigella) or black sesame seeds and mix.
  • Dig a well in the center of this mixture, add the yeast in the center of this well and add 1 cup (250 ml) of lukewarm water.
  • Leave to rest for 15 minutes.
  • Add the melted niter kibbeh and start kneading at low to medium speed while incorporating the rest of the lukewarm water very gradually until you obtain a soft and homogeneous dough that comes off the sides of the bowl.
  • Add salt and knead at medium speed for 5 minutes.
  • On a lightly floured work surface, roll out the dough and place it, covered with a cloth, in a warm place, away from drafts, for 90 minutes so it can rise.
  • At the end of the first rise, knock back the dough on a lightly floured work surface and divide it into two dough pieces.
  • Roll out the two dough pieces into a circle about 12 inches (30 cm) in diameter.
  • Place each circle in a round baking pan, such as a pizza pan.
  • Cover the two himbasha, and place them in a warm, draft-free place for 10 minutes, for a second rise.
  • Meanwhile, preheat the oven to 350 F (175°C).
  • Using a sharp knife, or cookie cutters of different sizes, mark 4 to 5 concentric circles on the first loaf, working from the center to the edges, then make cuts intersecting in the center to form a wheel pattern.
  • On the second loaf, make decorative patterns.
  • Froth the milk and melted kibbeh niter (or olive oil) in a bowl.
  • Brush the himbasha with this mixture and bake for 25 to 35 minutes until cooked through and golden brown.

Niter Kibbeh

 Similar to ghee, niter kibbeh or niter qibe (ንጥር ቅቤ), also called tesmi, is a spicy seasoned clarified butter that’s widely used in Ethiopian and Eritrean cuisines.

It brings a lot of flavor to dishes thanks to the spices it contains, and also has the ability to heat up very high to grill food.

The butter is clarified by separating the fat from the whey, or more precisely, the casein and the whey. It does not burn, and keeps much longer than regular butter. Suitable for people who are lactose intolerant or sensitive to casein. It is also more digestible and less fatty than conventional fresh butter.


Ingredients

  • 21 oz (600g) unsalted butter , cut into cubes
  • ½ small onion , chopped
  • 3 cloves garlic , minced
  • 1 teaspoon of korarima (Ethiopian cardamom)
  • 2 tablespoons fresh ginger , minced
  • 1 cinnamon stick
  • ½ teaspoon beso bela (Ethiopian holy basil)
  • ½ teaspoon koseret (Ethiopian oregano)
  • 1 teaspoon whole black peppercorns
  • 3 whole cloves
  • 1 teaspoon fenugreek seeds
  • 1 teaspoon coriander seeds
  • 1 teaspoon cumin seeds
  • ½ teaspoon ground nutmeg
  • ½ teaspoon ground turmeric

Equipment

  • 2 glass jars (8½ fl oz / 250 ml), with airtight seal, sterilized
  • Non-stick casserole dish
  • Cheesecloth or muslin

Instructions

  • Roast the korarima, cinnamon, coriander, fenugreek and cumin seeds for 3 minutes over medium heat, stirring regularly.
  • Place all ingredients into a non-stick saucepan and bring to a boil over very low heat.
  • Simmer over very low heat for 90 minutes, being extremely careful not to burn the butter.
  • Using a slotted spoon, skim off as much of the foam as possible.
  • Strain the contents of the pan through a fine mesh cheesecloth or muslin.
  • Pour the niter kibbeh into sterilized glass jars with airtight seals.
  • Let cool completely and tightly close the jars.
  • Niter kibbeh can be stored at room temperature for at least 3 weeks, in the refrigerator for 3 months, or several months in the freezer.