Ingredients for the chicken:
700gr / 1.5 pounds chicken breast in fillet
1 pear
200g/ 0,4 pounds Parma ham or black forest ham sliced
Olive oil or butter
Fresh sage (optional)
Ingredients for the sauce:
200g / 0,4 pounds truffled cheese or other cheese you like
200g / 0,4 pounds mascarpone
1 cup milk
1/2 cup white wine
1 tbsp flour
Truffle oil
Salt and pepper to taste
First step is cut the pears in wedges, in a plate add one slice of Parma ham then put the chicken breast on the top. With the pear in the middle roll it.
Bake the involtini in a cast iron skillet or copper pan with a little bit of olive oil or butter for about 30 minutes in 180C / 360F.
When the involtini is cooked take them out of the pan. On the same pan you cooked the chicken add the sage and white wine and cook for about five minutes in medium heat or until the alcohol of the wine evaporates. Then, mix the mascarpone, the cheese and the cup with milk mixed with the flour. Let cook in low heat for five minutes. After the sauce is thick, add the chicken and few drops of Truffled olive oil!


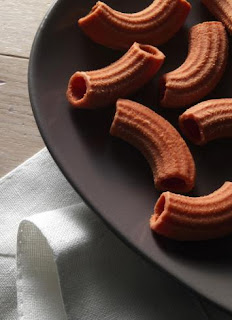


STEP 1 - Preparing the dough by hand
Pour the flour into a bowl; add the eggs, the water and the bag of squid ink.
Mix with a fork to thoroughly blend the ingredients with
Knead the dough with your hands until it is completely smooth and consistent. If the dough is too dry, add some water; if it is too sticky, add some flour. Perfect dough should never stick to your fingers.
Remove the dough from the bowl and place it on a table, lightly dusted with flour.
If necessary, continue kneading the dough by hand and break it up into little pieces.


